Metering to Middle Grey
August 6th, 2019When you point your camera at a subject with the camera in auto mode it evaluates the various light intensities across the scene and attempts to determine the proper settings to achieve a balance between the light and dark regions. It tries to determine settings that will produce middle grey in the resulting photograph.
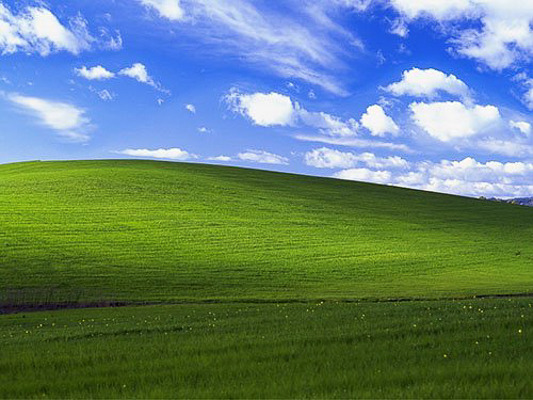
Middle grey is a tone that is perceptually about halfway between black and white. Middle grey is defined as a tone that reflects 18% of visible light. Oddly enough green grass and blue skies both translate to values very close to middle grey.
This photograph by Charles O’Rear illustrates my point. (The image was used by Microsoft as the desktop background for Windows XP. Due to the pervasiveness of Windows XP this might be the most viewed photograph in the history of photography.)
Here it is again converted to black and white using the saturation slider in Lightroom.
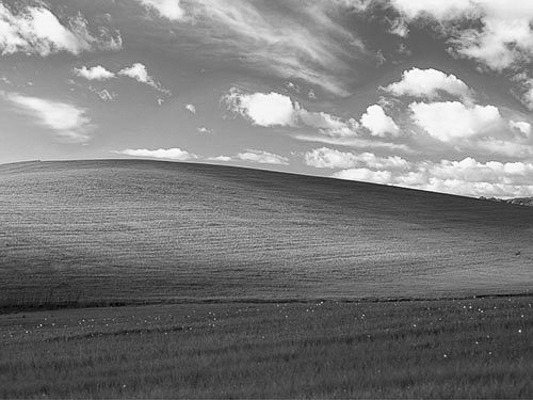
The tones in the sky and grass are very similar and close to middle grey (some variances exist but hopefully you get my point).
Letting the camera do it’s thing and adjust to middle grey works great most of the time but middle grey isn’t always desirable. Sometimes you want your photograph to be lighter than middle grey. If you’re shooting a winter snow scene allowing the camera to produce middle grey is going to result in grey snow which doesn’t match our expectations and will result–most of the time–in an unappealing image. On the other hand if you’re shooting the night sky and the milky way, allowing the camera to auto adjust to middle grey is going to render the blackness of empty space too light, again resulting in an inaccurate representation of what our eyes see and most likely an unappealing image.
Next week I’ll talk about two of the settings that allow us some control over how the camera adjusts to the light intensity on the subject we’re shooting.